While fuel burning engines are the norm in today’s society, electrical cars are slowly gaining prominence in the industry for being the more environmentally friendly vehicle. This makes motorized cars an interesting concept for anyone to learn. If you wish to understand how an electric car works, why not create your very own motor-powered car? Or given the smaller scale – a battery powered car.
What you will need:
- 2 dowels (4mm diameter and 10 cm long)
- 2 wooden blocks (1cm thick and 7cm long)
- plastic tube (wide enough to slip the dowel through – but not too big)
- plastic corrugated sheet (approximately 12cm long and 8cm wide)
- 1 smaller transmission pulley
- 4 pulley wheels
- 4 tire rings
- screw eyes (eyes should be big enough to insert the dowel)
- 2 brass fasteners
- brass paper clips
- red and black wires
- battery holder
- small electric motor with motor mount
- small motor pulley
- rubber band
What you need to do:
- Cut the plastic tube into 4 pieces – around 1cm each.
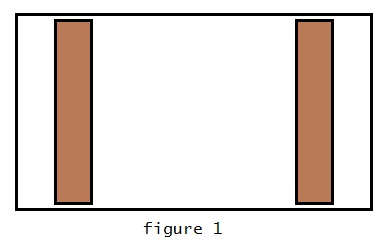
- Place the wooden blocks on the plastic corrugated board as shown in figure 1. Place the screw eyes on the other side of the plastic corrugated board to secure the block to the board. Place the screw eyes around 1 cm from the edge of the board.
- Insert the dowel through the eyes. This will be the axle of the motorized car that you are building.
- Insert the plastic tube in the dowel. See figure 2.

- Fit the small transmission pulley in one of the axles then fit the 4 other bigger pulleys into the remaining axles. Fit a tire ring into each of the pulleys. See figure 3.

- Take the two brass fasteners and poke them through the plastic board. One paper clip should be fastened under one of them. Place the fasteners 1cm from the edge of the board, on the side across from the small transmission pulley. Use the paperclip as your basis for the distance between the two fasteners. The paperclip should be able to touch both.
- Secure the battery holder beside one of the wooden blocks – specifically the one nearest the paperclip.
- Cut the red wire in two and strip around 1cm from every end. Take one red wire and connect one end to the positive end of the battery holder and the other end to the brass fastener with the paperclip. Take the other wire and connect one end to the second brass fastener.
- Take the black wire, strip 1cm from each end. Connect one end to the negative end of the battery holder.
- Position the motor clip at the base of the board nearest the small transmission pulley. Connect the black and red wire to the two terminals of the motor. See figure 4.

- Insert a small pulley into the motor shaft. Use a rubber band and put it around the small pulley on the motor and small transmission pulley (tire).
- Insert the battery, and connect the paperclip to the other brass fastener. This should complete the circuit and the motorized car should move.


